 Lepusheng
A Glue Tape Roller is a handheld tool that applies a narrow strip of adhesive as you move it across a surface. Inside, a small spool system guides adhesive from a backing film onto paper, card, or another suitable material. The result is a clean, controlled bond without a wet brush or a long drying wait. That sounds simple. The details matter.
Most models have a compact plastic body, a rotating applicator tip, and a replaceable or enclosed adhesive cartridge. Press the tip lightly against the material, then pull it steadily. The roller transfers adhesive along the path, much like laying down a thin ribbon. It can help with greeting cards, scrapbooks, photo mounting, school projects, and light office tasks. For best results, use smooth, dry surfaces and avoid twisting the tool mid-stroke. A jagged line can leave gaps.
Not every roller performs equally well. Adhesive strength, tape width, and refill design vary by model, so check the product specifications before choosing one. Some adhesives are intended for temporary positioning; others create a firmer bond. Even a strong roller may not hold heavy objects or rough materials securely. I have found that a quick test on scrap paper can prevent wasted work, though it is easy to skip when you are in a hurry. The following guide explains the roller’s parts, how its transfer mechanism works, and what to consider when using or selecting one.
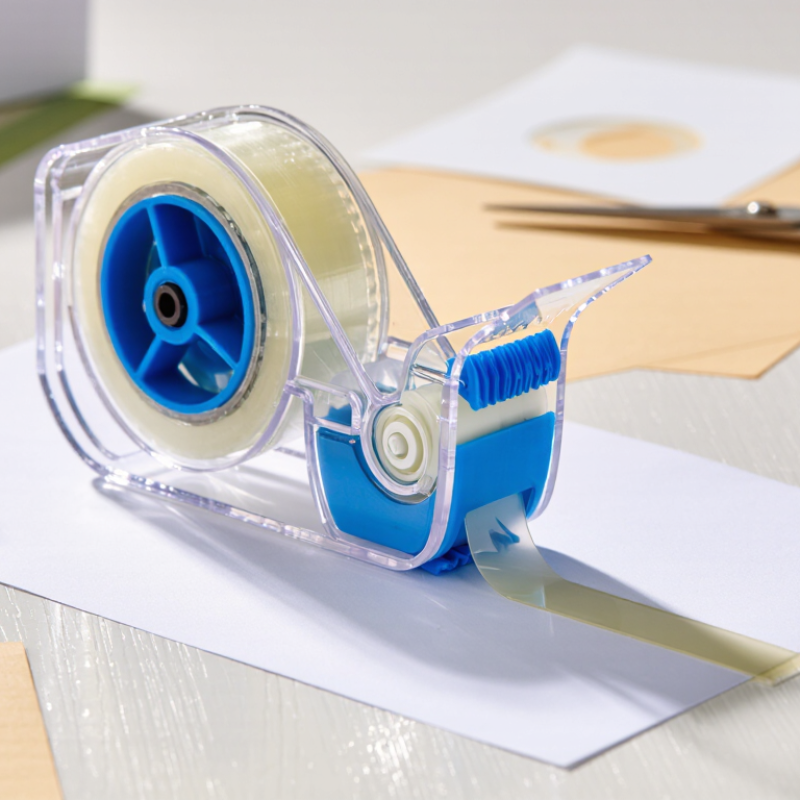
A glue tape roller is a handheld applicator that transfers a thin strip of adhesive onto a surface. It usually contains a refill cartridge, a rotating transfer head, and a protective case. Unlike liquid glue, it leaves no wet layer or strong odor. The adhesive feels dry immediately, which makes the tool useful for paper crafts, card making, scrapbooking, school projects, and light office repairs.
The mechanism is simple. When the roller moves forward, the transfer head presses against the material. Its internal wheel releases adhesive from a backing film and places it in a steady line. A small gear controls the film’s movement, so the tape does not normally bunch up. Smooth pressure works best. Too much force may stretch the adhesive strip or damage thin paper. Too little pressure can create gaps.
It is a clean tool.
From practical use, the roller performs best on dry, dust-free surfaces. Paper, cardboard, photographs, and lightweight labels usually bond well. However, results vary with texture, moisture, and storage conditions. I have found that very rough card can expose weak spots, even when the application looks complete. That limitation is easy to overlook. Users should test a small area before handling valuable materials. Keeping the cap closed also helps prevent dust from reaching the transfer head.
| Data Dimension | Description | Typical Characteristics |
|---|---|---|
| Product Definition | A glue tape roller is a handheld applicator that transfers a layer of dry adhesive onto a surface. | Clean, portable, fast, and designed for controlled application. |
| Adhesive Format | The adhesive is supplied as a coated tape wound around an internal spool. | The adhesive is generally solid and does not require drying time. |
| Main Components | Most units include a housing, adhesive spool, take-up spool, applicator head, roller, and protective cover. | The parts work together to keep the tape aligned and apply it evenly. |
| Application Method | Press the applicator head against the target surface and move the roller in a straight line. | Light, steady pressure usually produces the most consistent adhesive transfer. |
| Operating Principle | As the roller moves, the adhesive tape contacts the surface while the backing separates and winds onto the take-up spool. | The result is a narrow, continuous strip of adhesive with minimal mess. |
| Adhesive Coverage | Coverage is determined by the width and length of the adhesive tape inside the roller. | Common formats provide a narrow line or band suitable for paper and lightweight craft materials. |
| Drying Time | Dry adhesive tape does not need the evaporation period associated with liquid glue. | Bonding can begin immediately after the adhesive is applied and the materials are pressed together. |
| Typical Uses | Suitable for paper, photographs, envelopes, cards, scrapbooking, school projects, and light office work. | Best suited to clean, dry, smooth, and relatively lightweight materials. |
| Key Advantages | Provides accurate application without brushes, liquid spills, or glue strings. | Convenient, low-maintenance, quick to use, and easy to store. |
| Important Limitations | Performance may be reduced on dusty, oily, wet, rough, or highly flexible surfaces. | It is generally less suitable for heavy-duty structural bonding or very thick materials. |
| Storage Conditions | Store the roller in a cool, dry place and keep the protective cover closed when it is not in use. | Excessive heat, moisture, dust, and direct sunlight can affect adhesive performance. |
| Best Practice | Clean and dry the surfaces, apply the adhesive smoothly, and press the joined materials together. | Avoid repeatedly rolling over the same area unless additional coverage is required. |
It is a handheld tool that applies dry adhesive in a narrow strip. It resembles a small correction-tape dispenser. The bond feels dry immediately.
An internal spool moves coated tape toward a rotating applicator head. Pressure transfers adhesive from the backing film onto the surface. Another spool collects the empty film.
Dry paper, cardboard, photographs, and lightweight labels usually bond effectively. Smooth surfaces provide more reliable contact. Rough card may create weak spots.
Usually, no drying time is needed. The adhesive feels dry after application. Still, pressing joined materials briefly can improve contact.
Keep the applicator head flat against the surface. Use smooth, steady pressure. Move slowly around corners. Heavy pressure can stretch the adhesive strip.
Too little pressure may leave gaps. Too much pressure may create uneven edges. A crooked starting angle can produce a visibly misaligned strip.
Remove dust and oil before applying the tape. Test a small area on scrap material. Keep the cap closed between uses. Store the roller away from heat.
Not always. It works well for light paper projects and small repairs. Rough fabric and heavily textured materials may need another adhesive. The tool is convenient, but not universal.
A Glue Tape Roller is a handheld tool that applies a clean, even layer of adhesive tape without liquid glue, drying time, or messy residue. Its main parts typically include a protective casing, a tape cartridge, a rotating application head, a winding mechanism, and a grip designed for controlled movement. As the roller moves across a surface, the application head presses the adhesive strip onto the material while the internal mechanism releases new tape and collects the used backing.
A Glue Tape Roller can bond lightweight paper, cardboard, photos, labels, craft materials, and other compatible flat surfaces. For the best results, keep the tool at a steady angle, apply gentle pressure, and move it smoothly in one direction. Surfaces should be clean, dry, and free from dust or oil. After use, replace the protective cap if available and store the roller in a cool, dry location away from heat, moisture, and direct sunlight. Proper handling and storage help maintain smooth application and extend the tool’s usable life.
